
A peak at the inner components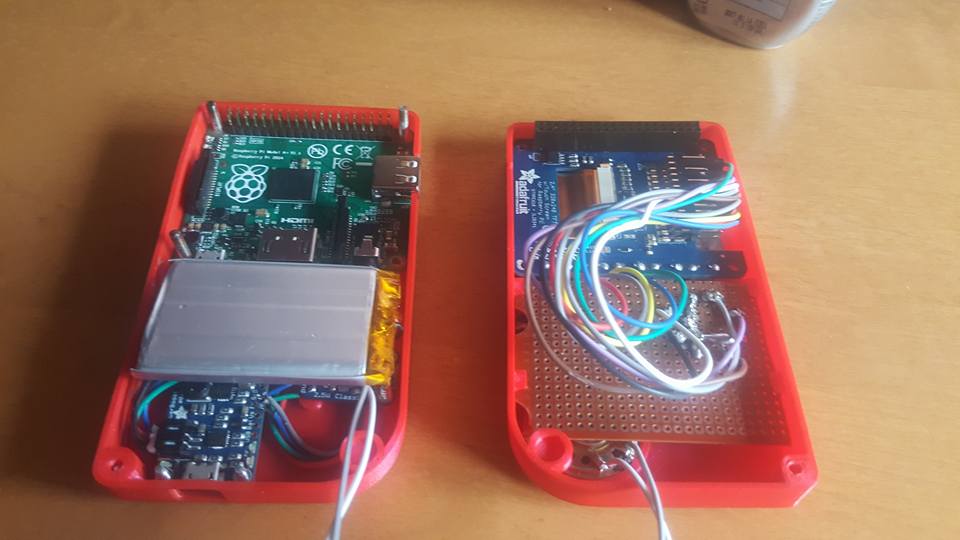
Parts List:
USD$ 34.95
USD$ 19.95
Adafruit Mono 2.5W Class D Audio Amplifier
USD$ 3.95
Tactile Switch Buttons (6mm slim) x 20 pack
USD$ 4.95
USD$ 1.50
Breadboard-friendly SPDT Slide Switch
USD$ 0.95
Tactile Push Button Switch Momentary
CDN$ 10.59
Faceplate and Buttons Pack for 2.4″ PiTFT HAT
USD$ 4.95
CDN$ 31.78
SODIAL(R) Classical 10pcs Solder Finished Prototype PCB
CDN$ 3.36
Lithium Ion Polymer Battery – 3.7v 2500mAh
USD$ 14.95
40pcs 20cm Female to Female Jumper
CDN$ 2.51
ADATA Premier 32GB microSDHC UHS-I Class 10
CDN$ 19.99


Comments: This is the case design used in the Adafruit tutorial. It comes in 2 variants, one with A, B, X and Y buttons and one with only A and B buttons. Of course, since Super Nintendo is one of the playable consoles I went with the 4 button variant. Its a really nice size for a game console as well, it being smaller than the official game boy pocket and all. The case does have some weaknesses though. There are no screws holding the corner with the speaker together and instead, the tutorial recommends you buy a couple mini magnets to do it. The cables also barely fit into the case and their combined pressure next to the screen has made a bulge in the case wall.
Comments: This was my second ever attempt at a Raspberry Pi emulation machine so I went out of my way to find a tutorial this time. This attempt definitely looks better than my last one but it has a number of disadvantages as well. For starters, this design uses the significantly less powerful Raspberry Pi A+ instead of the Raspberry Pi 3 model B which means it’s also lacking wifi and Bluetooth. It also uses a smaller screen which makes small fonts unreadable. Most annoyingly of all this tutorial forces you to use components only obtainable from Adafruit. This might not be too bad if you live in the states, but as a Canadian, it meant spending an arm and a leg on currency exchange rates and shipping fees, which is something I didn’t really have to deal with when ordering more affordable parts from China. It uses a much smaller battery rated at 2500mah which lasts about 4 hours and when factoring in the price of the boost/recharge circuit comes out to an outrageous price. But on the bright side, the mini speaker has much higher volume than the one I used last time around. This design actually fits comfortably in your hands and the polished design of the case made installing everything much simpler. Of course, I took some liberties deviating from the tutorial since I preferred to use my own buttons over 3D printed ones, and I already owned my own perf board and jumper cables so spending the extra money on a ribbon cable seemed unnecessary.
